
Pilea plants, also known as Chinese money plants or UFO plants, have gained popularity among plant enthusiasts for their quirky appearance and easy care requirements. With their striking round leaves and compact growth habit, these plants make a stunning addition to any indoor space. But what happens when your beloved Pilea starts outgrowing its current pot? In this article, we will explore the process of separating a Pilea plant, allowing you to propagate and expand your collection.
But before we delve into the steps of separating a Pilea plant, let’s take a moment to appreciate the unique attributes that make these plants so captivating. Pilea plants are known for their pancake-shaped leaves, which are slightly concave and have intricate patterns of veins. These leaves give the plant a distinctive, almost extraterrestrial appearance, hence its nickname “UFO plant.” Pileas are also revered for their air-purifying qualities, as they can filter various toxins from the surrounding environment. Fascinating, isn’t it?
Now, let’s move on to the key takeaways of this article. In the following sections, we will guide you through the process of separating a Pilea plant, step by step. From assessing the plant’s readiness for separation to ensuring proper care after the process, we will cover all the essentials. So, if you’ve been wondering how to enable your Pilea to thrive in a larger space while multiplying your plant collection, keep reading. You’re about to become a pro at separating Pilea plants!
Key Takeaways
1. Pilea plants can be easily propagated through separation, allowing you to expand your collection or share with friends.
2. Before separating a pilea, make sure it is healthy and well-established, with a good root system and multiple shoots or offshoots.
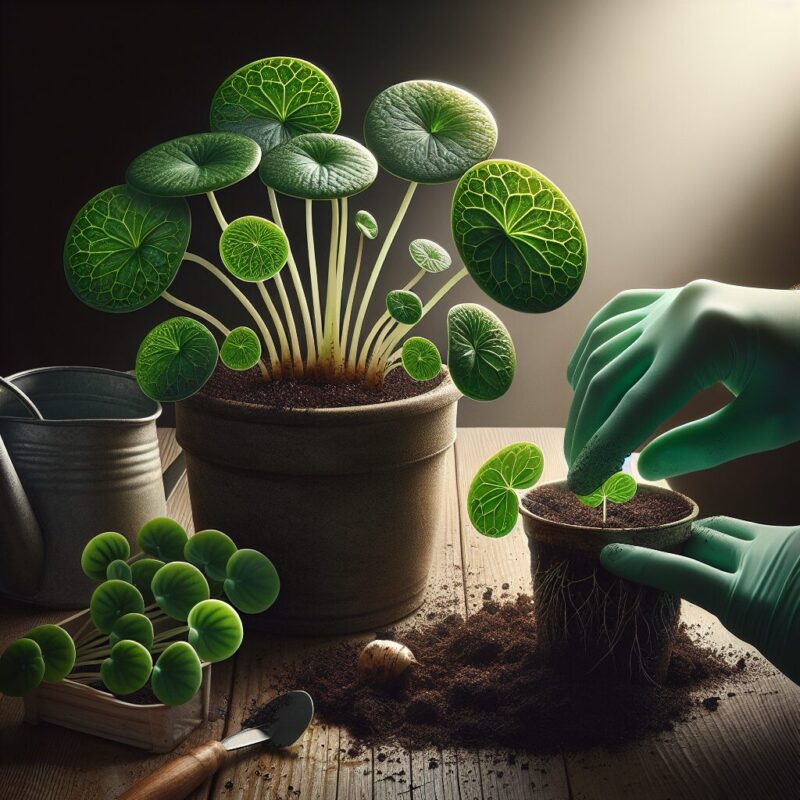
3. Carefully remove the plant from its pot, gently loosen the roots and separate the plant into smaller clumps while avoiding damage to the root system.
4. Once separated, repot each new plant into well-draining soil and provide them with proper care, including adequate light, water, and fertilization.
5. Regularly monitor the newly separated pilea plants for any signs of stress or poor growth, and make necessary adjustments to ensure their successful acclimation.
How Can I Efficiently Separate My Pilea Plant?
Section 1: Understanding the Significance of Separating Pilea Plants
Separating a pilea plant is a crucial step to promote its healthy growth and ensure its longevity. This process allows you to propagate new plants from the parent plant and maintain their overall health. By separating your pilea plant correctly, you can create a beautiful collection of thriving plants to brighten up your indoor space.
Section 2: When is the Ideal Time to Separate a Pilea Plant?
Timing plays a crucial role in successfully separating your pilea plant. It is recommended to perform this procedure during spring or early summer when the plant is actively growing. This ensures proper root development and helps the new plants establish themselves effectively.
Section 3: Step-by-Step Guide to Separating a Pilea Plant
Step 1: Gather the Necessary Tools
Before you begin the separation process, make sure you have the following tools ready:
- Sharp pruning shears or scissors
- Disinfectant spray or rubbing alcohol
- Plant pots or containers with drainage holes
- Well-draining potting soil
- Watering can
Step 2: Prepare the New Planting Containers
Thoroughly clean and disinfect the planting containers to reduce the risk of transferring any diseases or pests. Fill them with well-draining potting soil, leaving enough space for the new plant’s root system.
Step 3: Assess and Divide the Pilea Plant
Inspect your pilea plant for natural separation points, such as offshoots or multiple stems emerging from the base. Carefully separate these sections, ensuring each division has an adequate amount of roots and stems. Gently detangle any intertwined root systems to minimize damage.
Step 4: Trim and Prune
Trim any damaged or wilted leaves, as they can hinder the plant’s growth. Additionally, if any roots appear overly long or tangled, consider pruning them to encourage healthy new root growth.
Step 5: Planting the Separated Pilea
Place each separated pilea section into its own prepared pot, ensuring the roots are well-covered with soil. Gently press the soil around the base of the plant to establish firm contact between the roots and the potting mix. Avoid overwatering at this stage.
Step 6: Post-Separation Care
After separating your pilea, provide them with adequate sunlight (bright, indirect light is preferable), and maintain a consistent watering schedule. Avoid overwatering as it can lead to root rot. Monitor your new plants closely to ensure they adapt well and continue to thrive.
Section 4: Tips for Successful Pilea Plant Separation:
- Make sure each divided section has a sufficient amount of roots and stems to ensure successful growth.
- Disinfect your tools before and after each separation to prevent the spread of diseases.
- Do not force any divisions if they appear too tightly connected; gentle teasing of the roots will help with separation.
- Place your newly separated pilea plants in a warm and humid environment to promote faster root development.
- Consider using a rooting hormone for better success rates, especially with larger divisions.
- Regularly monitor and adjust watering needs to prevent over or underwatering the newly separated plants.
1. Can I separate a Pilea plant without harming it?
Yes, you can separate a Pilea plant without causing harm as long as you follow the proper techniques and handle the plant with care.
2. When is the best time to separate a Pilea plant?
The best time to separate a Pilea plant is during its active growth period, which is typically in the spring or early summer. This allows the plant to recover and establish new roots more effectively.
3. What tools do I need to separate a Pilea plant?
You will need a pair of sharp, clean gardening shears or scissors, a clean and sturdy pot for the newly separated plant, and well-draining potting soil.
4. How do I separate a Pilea plant?
To separate a Pilea plant, gently remove it from its current pot and carefully separate the individual plants by gently teasing the roots apart. Be sure to handle the plant and roots with care to minimize damage. Then, plant each separated plant in its own pot, ensuring the roots are covered with soil and gently press the soil around the base of each plant.
5. Should I water the Pilea plant after separating?
Yes, after separating a Pilea plant, it is important to water it thoroughly. This helps to settle the soil around the roots and provide hydration to the newly separated plant. However, be cautious not to overwater, as this can lead to root rot.
6. How often should I water the separated Pilea plants?
The watering frequency for separated Pilea plants is similar to that of established plants. Allow the top inch of soil to dry out before watering, and then water thoroughly until it drains out from the bottom of the pot. Avoid letting the plant sit in standing water.
7. Can I use fertilizer on the separated Pilea plants?
Yes, you can use a balanced liquid houseplant fertilizer on the separated Pilea plants. Follow the instructions provided on the fertilizer packaging for the correct dosage and frequency. Fertilizing during the growing season can help promote healthy growth.
8. How long does it take for separated Pilea plants to recover?
The recovery time for separated Pilea plants can vary depending on various factors such as the overall health of the plant, environmental conditions, and care provided. Generally, it takes a few weeks for the plant to recover and show signs of new growth.
9. Can I propagate a Pilea plant through separation?
Yes, separating a Pilea plant is a common method of propagation. Each separated plant can be potted individually and will grow into a new plant with proper care.
10. How can I prevent shock after separating a Pilea plant?
To prevent shock after separating a Pilea plant, it is important to provide the newly separated plants with appropriate lighting, temperature, and humidity conditions. Keep them in a warm and humid environment and place them in bright, indirect light for a few weeks until they have fully recovered.
Final Thoughts on How to Separate a Pilea Plant
Separating a Pilea plant can be a rewarding process, allowing you to expand your collection or share the plants with others. Remember to be gentle during the separation process and provide the separated plants with proper care and conditions for optimal recovery. With patience and proper care, your separated Pilea plants will thrive and continue to bring joy to your space.
By learning how to separate a Pilea plant correctly, you can successfully propagate this beautiful and trendy houseplant, which is known for its unique circular leaves. Enjoy the process of nurturing your separated Pilea plants and watching them grow into thriving green additions to your home or office environment.