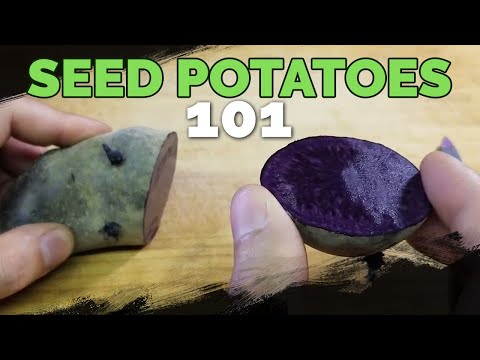
If you want to grow potatoes, the first step is to prepare the seed potatoes correctly. Preparing the seed potatoes prior to planting is essential for having a successful crop. This guide will provide you with tips on how to prepare seed potatoes before planting.Seed potatoes are potatoes that have been grown specifically to be planted and harvested for their edible tubers. They are usually certified disease-free and of a higher quality than those used for consumption. Seed potatoes are generally sold in small sizes so they can be planted whole, although they may be cut into smaller pieces if needed.
Variety
When buying seed potatoes, it is important to know the variety. Different varieties of potatoes have different characteristics, such as taste, texture, size and disease resistance. It is important to choose the right variety for your needs. Some varieties are better suited for boiling or baking while others are better for making chips or French fries. Additionally, some varieties are more resistant to common diseases like blight or scab. Choosing a variety that fits your needs will help ensure a successful harvest of potatoes.
Disease Resistance
When buying seed potatoes, it is important to look for signs of disease resistance. Many potato varieties are prone to common potato diseases such as blight and scab. Look for certified seed potatoes that have been tested and proven to be disease resistant. Additionally, buy from reputable suppliers who can provide evidence of healthy seed potatoes that have been tested for disease resistance.
Size and Shape
It is also important to consider the size and shape of the seed potatoes when buying them. Generally speaking, larger potatoes contain more starch and will produce larger yields than smaller ones. Additionally, some types of potatoes are better suited to certain shapes such as round or oblong. When selecting seed potatoes, make sure they are uniform in size and shape so that they can be planted properly.
Quality
Finally, it is important to check the quality of the seed potatoes before purchasing them. Look for firm tubers with no visible signs of damage or rot. Avoid soft or wrinkled tubers as they may not produce a good yield due to poor quality seeds inside them. Additionally, make sure the eyes on the tubers are small and tight – large eyes may indicate poor germination potential.
By taking these factors into consideration when buying seed potatoes, you can ensure you get a good quality product that will produce a successful harvest of delicious potatoes!
Storing Seed Potatoes Before Planting
Storing seed potatoes before planting is an important step in the gardening process. Seed potatoes are small, immature potatoes that are planted and will eventually grow into a full-sized potato plant. Before planting them, it is important to take certain steps to ensure that they are stored properly and remain viable. Here are some tips for storing seed potatoes before planting:
1. Store seed potatoes in a cool, dark place with temperatures between 45-50°F (7-10°C). The ideal storage temperature for seed potatoes is 45°F (7°C).
2. Keep seed potatoes in a well ventilated container or bag away from direct sunlight. This will help maintain the proper temperature and prevent the growth of molds or other organisms.
3. Make sure to check on your seed potatoes periodically to check for any signs of decay or disease. If any of these issues are present, discard the affected potato immediately.
4. To ensure maximum viability, store your seed potatoes in an area with low humidity. High humidity can cause the potatoes to rot quickly.
5. If you have more than one variety of seed potato, store them separately and label them accordingly so that you know which variety is which when planting time comes around.
By following these simple tips, you can ensure that your seed potatoes remain healthy and viable until it’s time to plant them in your garden!
Tools Needed to Prepare Seed Potatoes
Preparing seed potatoes for planting requires a few essential tools. First and foremost, a sharp knife is needed to cut the potatoes into pieces. This should be done carefully in order to ensure that each potato piece contains at least one eye. A trowel is also necessary for digging the planting furrows in which the potato pieces will be placed. Additionally, a hoe is useful for covering the furrows and making sure they are level with the surrounding soil. Finally, a rake can be used to smooth out any irregularities in the soil surface after planting.
It is also important to have on hand some sort of fertilizer or soil amendment that can be used to enrich the soil prior to planting. This will help ensure that the seed potatoes have plenty of available nutrients as they grow and develop. Lastly, having protective gloves and clothing is highly recommended as potato plants can contain harmful bacteria and other pathogens which can cause skin irritation or allergic reactions in some individuals.
Chitting Seed Potatoes
Chitting, or pre-sprouting, potatoes is a great way to get a jump start on the growing season. It’s a simple process that encourages the potato seed to form shoots before it is planted. Chitted potatoes will have bigger yields and tend to mature earlier than non-chitted potatoes. Here are some tips on how to chit your seed potatoes.
The first step is to select the right potatoes for chitting. Look for firm, smooth tubers with plenty of “eyes”, or small buds that indicate where shoots will form. Avoid any potatoes with any soft spots or signs of sprouting. Place the chosen tubers in a light, airy spot such as a windowsill or tray at room temperature. Make sure they’re not in direct sunlight as this can cause them to dry out and perish before they are planted.
Next, stand the tubers upright with the “eyes” facing upward and spacing them about 2 inches apart from one another. Cover them lightly with newspaper or an old cloth to keep them in the dark but still let air circulate around them. You should begin to see small green shoots forming after about two weeks.
When the shoots reach about 1 inch long, it’s time to plant your potatoes in your garden or allotment plot. Make sure you dig a deep enough hole so that the potato can be underground with just its shoot showing above soil level. Keep soil moist but not too wet so that your crop doesn’t suffer from rot or disease.
By following these steps you should be able to get great yields of delicious homegrown potatoes for you and your family!

Benefits of Chitting Seed Potatoes
Chitting seed potatoes is a process where you encourage the seed potatoes to sprout before they are planted in the ground. This is done by placing the seed potatoes in a cool, light environment and waiting for them to develop small sprouts. Chitting helps to get your potato crop off to an early start and can result in a larger yield. Here are some of the other benefits of chitting seed potatoes:
The most obvious benefit of chitting is that it results in earlier harvests. By encouraging the seed potatoes to sprout before they are planted, you can get your crop off to a good start much sooner than if you had not chitted them. This means that you can enjoy your first harvest of potatoes earlier than normal.
Chitting also makes for healthier plants and stronger yields. The small sprouts that form on the surface of the seed potatoes contain nutrients which help to strengthen the plants as they grow. This makes them more resistant to disease and more likely to produce a good yield at harvest time.
Finally, chitting can help save time and effort when planting your potato crop. As the seeds have already started to sprout, it takes less time for them to develop into full-sized plants once they have been planted in the ground. This means that you don’t have to spend as much time preparing and planting each individual seed potato, saving you both time and effort.
How to Cut Seed Potatoes for Planting
Planting potatoes from seed can be a great way to start your own garden, and it is relatively easy to do. Before you can plant your potatoes, however, you need to cut them correctly. Cutting seed potatoes for planting correctly will give you the best chance of success in your garden. Here’s how to do it.
To begin, select healthy seed potatoes that are free of disease and pests. The larger the potato, the more pieces you can cut from it. Make sure each piece has at least two eyes on it. If the potato is particularly large, you may want to cut it into three or four pieces instead of two.
Using a sharp knife, cut each potato into pieces that are about 2 inches in size. Make sure you cut straight down and through the center of the potato so that there is an equal amount of potato flesh on either side of the piece you are cutting off. It is important not to damage any of the eyes when cutting as this could lead to poor germination or disease in your plants.
Once you have finished cutting all your potatoes, allow them to sit in a cool, dry place for one or two days before planting them. This will allow any cuts or wounds on the potatoes time to heal and form a protective layer before they are planted in soil. Once they have healed, your seed potatoes will be ready for planting!
Varieties
When cutting seed potatoes, it is important to consider the variety of potatoes you are using. Different varieties of potatoes will have different characteristics and it is important to choose the right one for your specific needs. Some varieties may be better suited for a specific climate or soil type, while others may be better for certain dishes or recipes. It is important to research the characteristics of each variety and choose one that will best meet your needs.
Size
The size of the seed potatoes you are cutting is also an important factor to consider. Smaller seed potatoes are easier to handle and work with than larger ones, but larger potatoes may yield more overall yields. It is important to consider the size of seed potatoes you are working with when deciding how many pieces you need to cut them into for planting.
Tools
The tools used to cut seed potatoes are also important factors to consider. Using a sharp knife or other cutting tool will ensure that the cuts made in the potato are clean and precise, which can help ensure that each piece sprouts correctly when planted. It is also important to sanitize any tools used during this process, as any bacteria on the tool can potentially contaminate the potato pieces and cause them not to sprout correctly.
Storage
Once the seed potatoes have been cut, it is essential that they be stored properly in order for them to remain viable during germination and sprouting. Storing them in a cool, dark place away from direct sunlight helps ensure that they remain healthy until they are ready for use in planting. It is also important not to overcrowd them while in storage, as overcrowding can lead to disease and contamination of some of the seed pieces.

Conclusion
Potatoes are one of the most popular and versatile vegetables around. Before you can plant them, you need to prepare the seed potatoes. This involves cutting the potatoes into pieces, curing them in a warm, dark place for a few days, and then allowing them to dry out. Once this is done, you can plant your seed potatoes and look forward to a harvest of delicious potatoes!
With a bit of preparation and patience, you’ll be well on your way to enjoying a healthy crop of potatoes. Planting and harvesting your own potatoes can be an extremely rewarding experience – they’re not only delicious but easy to grow too. So grab some seed potatoes and get started today!

